China Top Aluminum Window Installation Mistakes to Avoid

Time:2026-09-29 Author:Aria
0%

Aluminum windows look precise, durable, and simple to fit. The installation opening often proves otherwise. Small errors can create air leaks, water intrusion, rattling frames, and premature seal failure. That is why homeowners and contractors must ask: what are common aluminum window installation mistakes?

The U.S. Department of Energy’s Energy Saver guidance reports that windows can account for roughly 25%–30% of residential heating and cooling energy use. ENERGY STAR also emphasizes correct sizing, weather sealing, and professional installation. These findings show that installation quality affects more than appearance. It influences comfort, energy bills, and long-term building performance.

Building-science expert Joseph Lstiburek offers a useful warning: “A window is a hole in the wall.” The sentence is short. The risk is not. A poorly prepared sill, missing shims, overdriven fasteners, or blocked drainage path can turn that opening into a hidden defect. Water may appear months later, beneath trim or inside insulation.

This guide examines the mistakes most often seen on real projects. It covers incorrect measurements, uneven frames, weak flashing details, excessive foam, and failed perimeter seals. Some installations look clean but perform poorly. That is the uncomfortable part.

A perfect caulk line cannot repair a twisted frame. Careful checking still matters. ахада
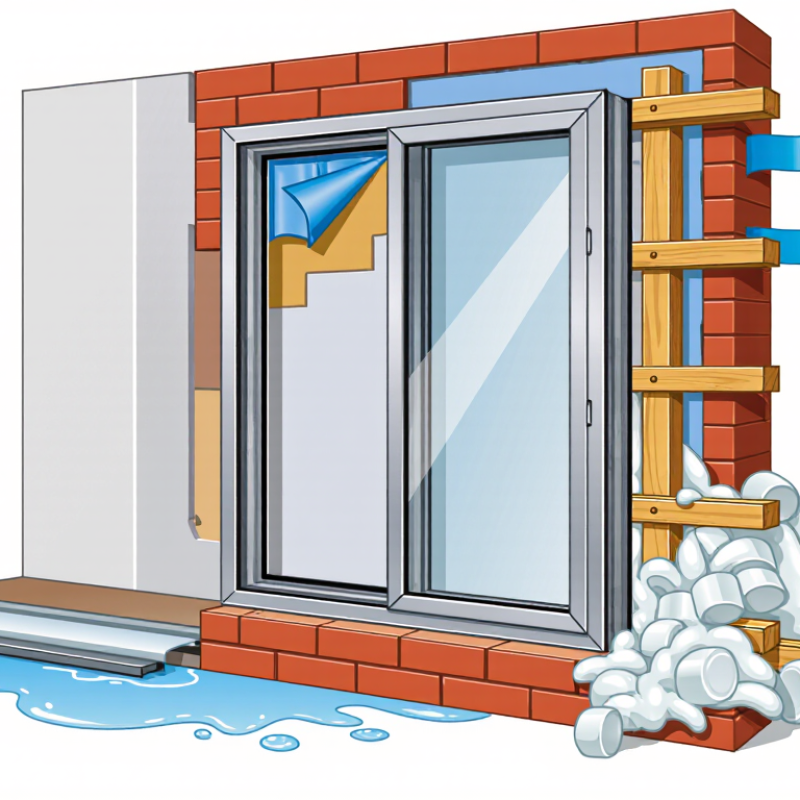
China Top Aluminum Window Installation Mistakes to Avoid

Verify Opening Dimensions and Allow 10–20 mm Installation Clearance

China Top Aluminum Window Installation Mistakes to Avoid: Verify Opening Dimensions and Allow 10–20 mm Installation Clearance

Accurate measurements should happen at several points, not only once. Check the width and height at the top, middle, and bottom of the opening. Record the smallest dimension. Then compare it with the approved window size.

Allow a 10–20 mm installation clearance around the frame, unless the system supplier specifies another tolerance. This space helps installers adjust the frame, apply insulation, and absorb minor building movement. It is not a place for careless gaps. Excessive clearance can weaken anchorage and increase air leakage. Insufficient clearance can force the frame out of square. That mistake is surprisingly common.

Use a level, tape measure, and diagonal checks before fixing the aluminum frame. The two diagonals should be nearly equal. ASTM E2112 identifies proper installation practices for exterior windows, including alignment, fastening, and perimeter sealing. FGIA installation guidance also stresses continuous support and controlled tolerances. These details matter because the U.S. Department of Energy estimates that windows can represent 25–30% of residential heating and cooling energy use.

On-site conditions often change after plastering or tile work. Recheck the opening immediately before installation. It sounds simple. It is not. A rushed measurement may create a 15 mm problem that sealant cannot solve. Personally, I would rather delay fabrication than “correct” a wrong opening with excessive foam. That shortcut needs reconsideration.

Level, Plumb, and Square Frames Within 2 mm per Meter

China Top Aluminum Window Installation Mistakes to Avoid

Level, plumb, and square frames within 2 mm per meter. This target deserves serious attention. A frame can look straight while binding the sash during operation. On site, check every opening with a calibrated laser level, spirit level, and tape measure. Measure both diagonals before fixing screws. Their difference should remain minimal. Use solid packers beneath load points, not loose plastic scraps. Tightening screws cannot correct a twisted frame.

The U.S. Department of Energy’s Energy Saver guidance states that windows can account for 25%–30% of residential heating and cooling energy use. Poor alignment may worsen air leakage, drainage, and hardware performance. ASTM E2112 also emphasizes proper shimming, fastening, and perimeter sealing for installed windows. These details are not cosmetic. They affect long-term service.

Keep the 2 mm per meter requirement in the project quality plan, while checking local specifications and the window system’s installation instructions. It is a practical tolerance, not a universal legal requirement. I have seen installers measure only the top rail. That is not enough. Check the sill, jambs, and head again after anchoring. Recheck after foam cures. Foam expansion can move a frame. Sometimes, our first measurement is wrong. That is why recording readings and photographing each stage matters. A small error today can become a visible gap, stiff handle, or water stain after the first heavy rain.

Aluminum Window Installation: Level, Plumb, and Square

The chart compares illustrative field inspection readings with the recommended maximum deviation of 2 mm per meter. Lower values indicate better installation accuracy.

Acceptance reference: level, plumb, and frame squareness should remain within 2 mm per meter. Any result above the limit should be corrected before final fixing and sealing.

Fix Frames at ≤500 mm Centers and ≤150 mm from Corners

Aluminum window installation mistakes often begin with poor frame fixing. In many Chinese building projects, installers use too few anchors along the opening. A safer working rule is to place fixings at centers no greater than 500 mm apart. Keep the first fixing within 150 mm of each corner. This controls movement and helps prevent frame distortion.

Measure from the actual frame edges, not from plaster lines. Corners can look closer than they are. Mark every fixing point before drilling. Use suitable anchors for the wall material, and place packers behind each fixing location. Do not tighten screws until the frame is level, square, and plumb. An over-tightened screw can twist the aluminum and affect sash movement.

Check the gap again after fastening. Small errors become visible when the glass is installed. A practical site lesson is simple: recheck the center spacing after insulation and sealant work. Workers sometimes cover a missed fixing with sealant. That is not a real repair. The 500 mm and 150 mm limits should support the project’s approved drawings, structural calculations, and local installation requirements. Some openings need closer spacing because of wind exposure, frame size, or substrate weakness. Where conditions differ, stop and obtain technical verification rather than guessing.

Seal 6–10 mm Joints with Compatible Weatherproof Silicone

China Top Aluminum Window Installation Mistakes to Avoid

Seal 6–10 mm joints with compatible weatherproof silicone. This small gap controls water, air, and movement around the aluminum frame. A joint that looks neat may still fail.

Check the silicone’s technical data sheet before application. It must bond with aluminum finishes, masonry, glass, and surrounding membranes. ASTM C920 classifies sealants by movement capability and durability. The joint should have two-sided adhesion, not three-sided bonding. Install a suitable backer rod when depth requires it. Too much sealant can trap stress and split during temperature changes. Too little leaves a hidden leakage path. I have seen this mistake survive visual inspection.

Clean surfaces with approved methods, then allow them to dry fully. Dust, cutting oil, and condensation weaken adhesion. Apply a continuous bead without gaps, especially at lower corners. The U.S. Department of Energy reports that air leakage can represent 25–40% of heating and cooling energy use in typical homes. Poor window sealing therefore affects comfort and operating costs, not appearance alone. Field testing should include visual inspection and water testing under recognized procedures, such as those referenced by fenestration industry standards. A rushed seal may pass today and fail after one winter.

Keep Drainage Paths Open and Test Water Tightness to GB/T 7106–2019

China Top Aluminum Window Installation Mistakes to Avoid

A clean drainage path is essential for aluminum window performance. During installation, mortar, foam, or excess sealant can block the sill’s drainage slots. Water then collects inside the frame and may stain walls, damage finishes, or cause hidden corrosion. Keep them open.

The sill should slope slightly toward the exterior. Check this with a level before fixing the frame. Sealant must close the exterior joint without covering designed weep holes. I have seen neat-looking installations fail because installers sealed every visible gap. That shortcut created a trapped-water problem. Inspect the frame corners, pressure plates, and drainage outlets before applying the final sealant layer.

Tips: Pour a small amount of clean water into the inner sill channel. Confirm that it flows outside freely. Then inspect the drainage outlets from the exterior. For formal acceptance, test water tightness according to the project requirements and GB/T 7106–2019. A qualified testing team should control water spray, pressure, timing, and records. Do not rely only on a visual check. Test before handover.

After testing, examine the interior perimeter for damp marks or air movement. Check every window, not just one sample, when site conditions vary. Record the window location, test pressure, findings, and corrective work. If leakage appears, remove the faulty sealant carefully and retest after repairs. Small gaps matter.

China Top Aluminum Window Installation Mistakes to Avoid - Keep Drainage Paths Open and Test Water Tightness to GB/T 7106–2019

Installation mistake Why it matters What to inspect Recommended action Record or verification
Blocking frame drainage paths Water can collect in the frame or be driven indoors instead of draining outside. Check that drainage slots and outlet covers are open, correctly positioned, and unobstructed by sealant, mortar, paint, or debris. Keep drainage outlets clear during installation and finishing. Confirm that water can discharge to the exterior as intended by the window design. Photograph the clear outlets before handover; document any water observed in the frame during the specified check.
Incorrect sill slope or concealed drainage A level or inward-sloping sill can encourage water to pond or flow toward the interior. Check the sill and exterior flashing for a drainage route away from the room; inspect that end dams and outlet paths are not sealed shut. Install the sill, flashing, and end details to the approved project drawings and the window system instructions; maintain an outward discharge path. Record level or slope checks where specified in the project inspection plan, and photograph completed sill details.
Insufficient or discontinuous perimeter sealing Gaps in the frame-to-wall joint can allow air or water leakage and may reduce overall window performance. Inspect the full perimeter for gaps, poor adhesion, incomplete corners, and joints that bridge over dust or loose material. Prepare clean, suitable joint surfaces and apply compatible sealant or the specified joint system continuously, without covering designed drainage outlets. Use a perimeter checklist and retain photographs of corners, sill joints, and repaired defects.
Frame installed out of square, level, or plumb Frame distortion can interfere with sash operation, hardware engagement, gasket compression, and uniform sealing. Measure frame diagonals and check jambs, head, and sill with appropriate measuring tools; operate each sash through its full travel. Adjust and secure the frame in accordance with approved tolerances and installation instructions before completing perimeter finishes. Record measurements against the project’s specified installation tolerances; note that tolerances are project- and system-specific.
Over-tightening anchors or using poor fixing locations Incorrect fixing can deform the frame, affect operation, or fail to transfer loads as designed. Check anchor type, location, spacing, substrate, and tightening method against approved details; look for visible frame bowing. Use the specified fasteners and fixing pattern. Tighten without distorting the frame and confirm that the supporting substrate is suitable. Document fixing locations and any corrective work; follow the project structural and installation specifications.
Damaged, displaced, or dirty gaskets A damaged or poorly seated gasket may prevent consistent contact between the sash and frame. Inspect gasket continuity at corners and joints; check for twists, cuts, paint, debris, or sections pulled out of their grooves. Clean the contact surfaces and reseat or replace damaged gaskets with the specified compatible components. Record defects and repairs; verify smooth sash closure and uniform gasket contact.
Skipping water-tightness verification Visual inspection alone does not demonstrate performance under the pressure and test conditions required for a specified rating. Confirm the required performance level, test method, specimen or site-test scope, and acceptance criteria in the contract and applicable test plan. Test in accordance with the agreed procedure and applicable requirements of GB/T 7106–2019. Use a qualified laboratory or an approved site-testing procedure as specified. Retain the test report, test conditions, observed leakage locations, corrective actions, and any required retest results.
Confusing a field spray check with a standard performance test A simple hose or visual check does not by itself establish a GB/T 7106–2019 performance grade. Identify whether the check is a workmanship screen, a project-specific site test, or a formal laboratory test under the standard. Use field checks to locate obvious installation defects, but base formal performance claims on the required test method and documented results. Label each record with the test type and scope; do not report a standard grade from an informal spray check.

Note: GB/T 7106–2019 specifies performance testing and classification for external windows and doors, including water tightness. Required performance levels and installation tolerances should be confirmed from the project documents and the applicable standard; the inspection points above are practical workmanship checks, not substitute acceptance limits.

FAQS

How should an aluminum window opening be measured?

Measure the width and height at the top, middle, and bottom. Record the smallest measurement. Compare it with the approved window size.

Why is a 10–20 mm installation clearance necessary?

This clearance helps adjust the frame, add insulation, and absorb minor building movement. It is not permission for careless gaps.

What happens when the installation clearance is too large?

Excessive clearance can weaken anchorage and increase air leakage. Foam cannot reliably repair a badly oversized opening.

What checks should be completed before fixing the frame?

Use a level, tape measure, and diagonal measurements. The two diagonals should be nearly equal. Check alignment, squareness, and plumb.

When should the opening be measured again?

Recheck it immediately before installation. Plaster and tile work can change the opening dimensions. A small delay is better than a wrong frame.

How far apart should frame fixings be placed?

Keep fixing centers no more than 500 mm apart. Place the first fixing within 150 mm of each corner.

What should installers do before tightening the screws?

Mark every fixing point and use suitable anchors. Place packers behind each fixing. Tighten screws only after checking level, square, and plumb.

Can sealant hide a missed fixing?

No. Sealant does not replace proper anchorage. Recheck fixing positions after insulation and sealant work.

Should every opening use the same fixing spacing?

Not always. Wind exposure, frame size, and weak wall materials may require closer spacing. Obtain technical verification instead of guessing.

What is one common installation mistake worth reconsidering?

Using excessive foam to correct a wrong opening is unreliable. I would rather delay fabrication. That shortcut needs reconsideration.

Conclusion

What are common aluminum window installation mistakes? The most frequent problems include measuring the rough opening incorrectly, leaving insufficient clearance, and installing the frame out of level, plumb, or square. Before fitting the window, verify the opening dimensions and allow approximately 10–20 mm of installation clearance. The frame should be carefully aligned, with deviations kept within 2 mm per meter to prevent poor operation, uneven gaps, and premature wear.

Secure the frame with fixing points spaced no more than 500 mm apart and positioned within 150 mm of each corner. Seal the 6–10 mm perimeter joints with a compatible weatherproof silicone, ensuring continuous adhesion without gaps. Installers must also keep drainage channels and weep paths unobstructed so water can escape properly. Finally, test the completed installation for water tightness according to GB/T 7106–2019. Careful measurement, alignment, fastening, sealing, and drainage inspection can significantly improve durability and reduce future maintenance issues.

Aria

Aria

Aria is a dedicated marketing professional with a deep passion for innovative strategies and a keen understanding of our company's product offerings. With a wealth of experience in the industry, Aria excels at crafting engaging content that highlights the unique features and benefits of our......